Summary: In this post I’ll show you a quick way to set up your own continuous reporting system.
I’ve been working on my follow-up to The Reporting Revolution. I think I did an okay job of setting up my basic argument, that it’s time to change how we report and move beyond the PDF.
I focused a lot on the why, and was less clear on the how. While I shared a handful of reporting strategies, I didn’t come out and say which I thought was best.
But the more I work with organizations on their reporting, the more convinced I become that continuous reporting is not one of the ways. IT IS THE WAY.
The Reporting Shift
Continuous reporting is what you do when you report as you go.
It can be as simple as it sounds. The biggest barriers are not from the technology required, but from habit, lack of training, and silos.
In most organizations, the people who evaluate the programs are different from the people who write the blog posts who are different from the people who design the website. So what would be easy for a little organization, one that has just a few people who wear many hats, can be incredibly complicated for a larger one.
But for the sake of this post, let’s pretend it is easy. That you, the evaluator, have the power to do the following three things.
The Continuous Reporting Three-Step Method
Let’s set up a modern reporting system.
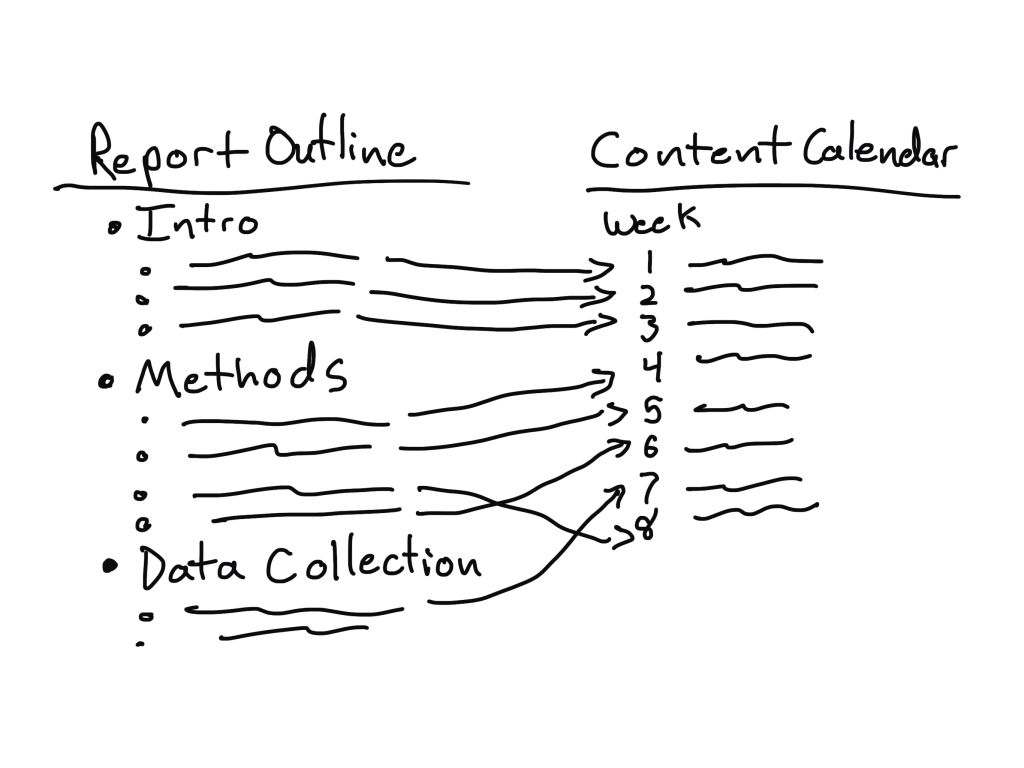
Step 1 – Turn your report outline into a content calendar.
You don’t need to wait until the evaluation is over to describe your methods. Think about it, what actually stops you from sharing updates on the data collection as you go?
Don’t have a report outline handy? Here, use this checklist shared by Western Michigan.
Your goal with a content calendar is to turn the report into something that gets shared over time. The simplest way to plan those posts is to just take your report outline and add some dates. Then use your schedule to plan your posts.
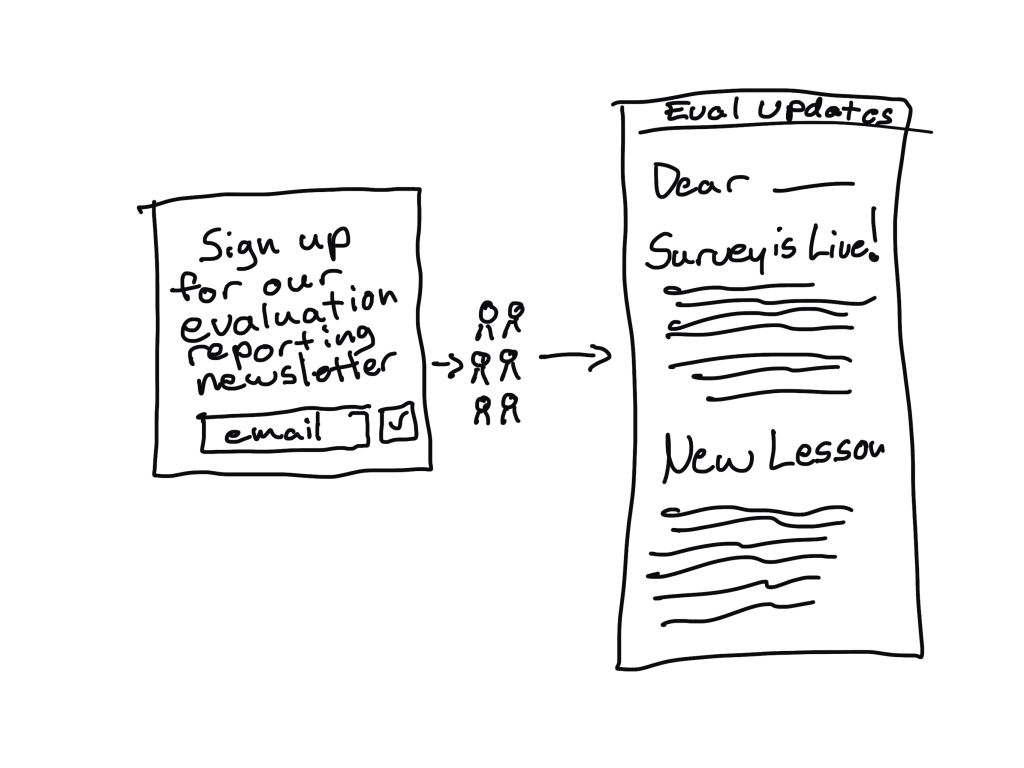
Step 2 – Setup an email newsletter.
An email newsletter is your most important modern reporting tool. And I’m saying this as a person who designs web reports for a living.
If you have zero budget, you can use Substack for free. There are also a bunch of other newsletter options out there, free and paid.
The basic idea is that you need a place where you can start growing your reporting audience. And you also need a way to share your reporting as you go. An email newsletter will do this for you.
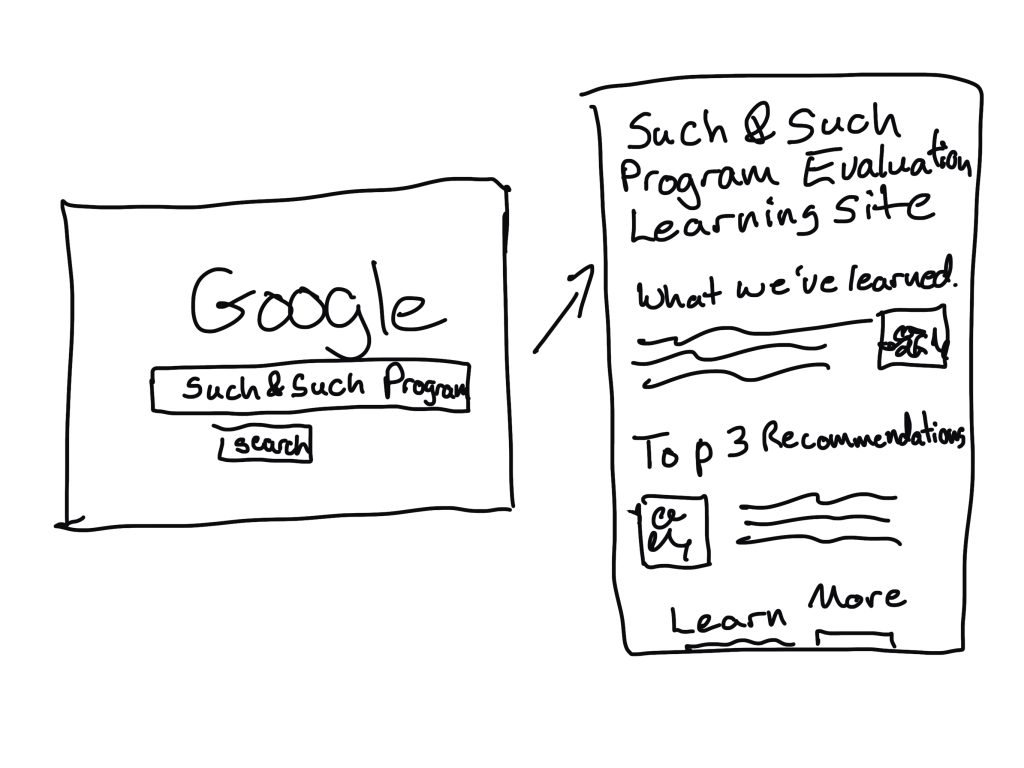
Step 3 – Setup a blog.
I build blog reports for my clients using self-hosted WordPress (WordPress.org).
But if you don’t have the skills or the budget, you can still start a blog. You can use WordPress.com or Medium for $0. Both are fairly easy to setup and launch.
Blogs help make your reporting public, and make it easier for your posts to be found via a Google search.
Now what?
Use the content calendar to decide what to write about. Use the blog to post your ongoing reporting. Mirror that reporting in the newsletter, or adapt it into a smaller chunk with a link back to the post.
As time goes on, grow your email list. Invite new people to join as you share your reporting.
That’s it.
Now you have a reporting system that’s easy, cheap, and gives you tons of metrics that you can use to monitor your reporting efforts.
What about printing?
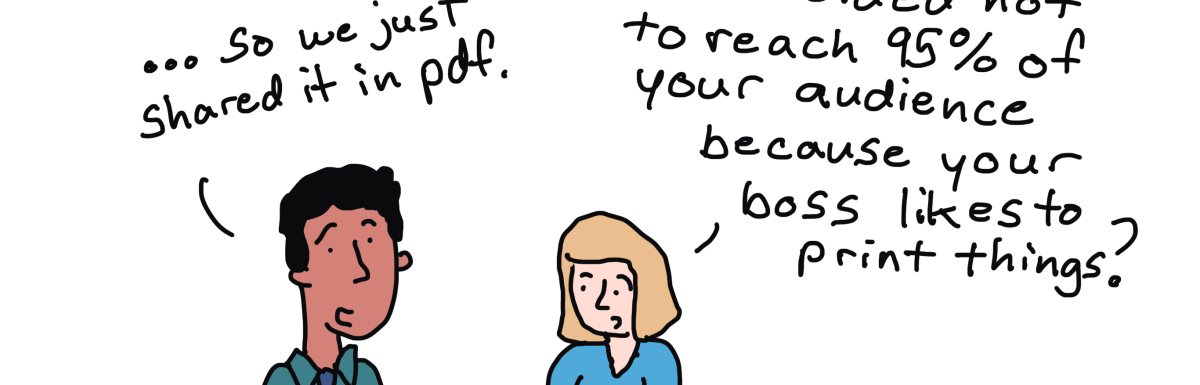
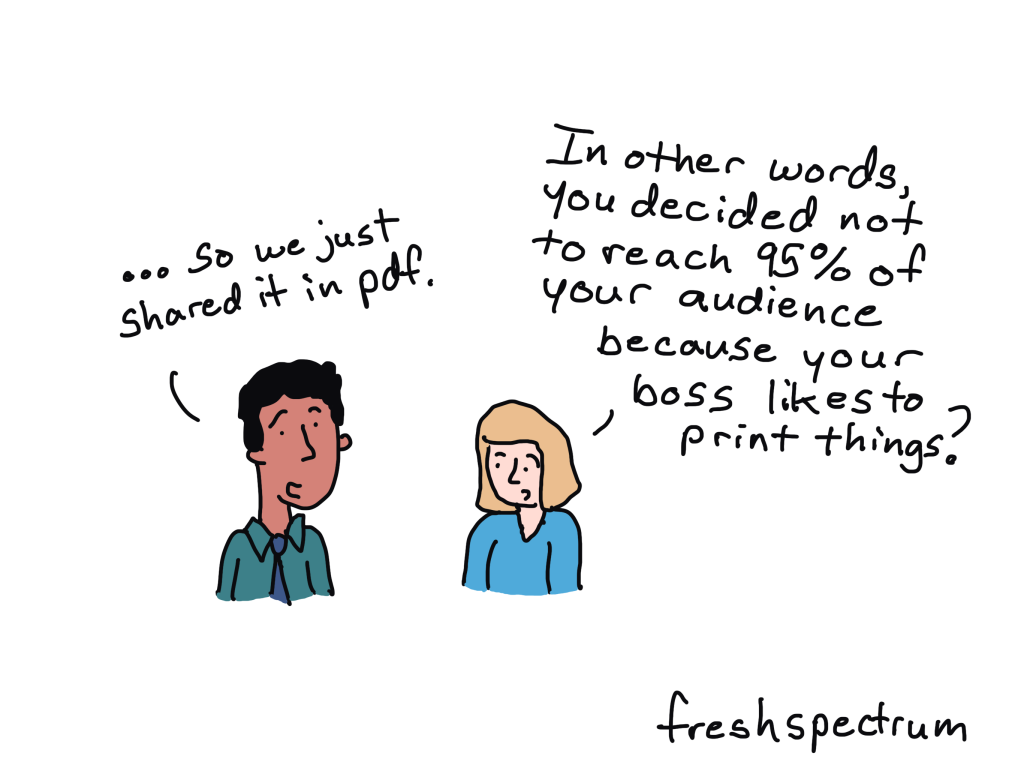
The goal of reporting like this is to be digital-first, but that doesn’t mean you can’t be PDF-second. Some people like printing stuff out or having the option of saving a digital copy to their computer. You might be one of those people.
There are ways to make a blog post printable, but it is often cleaner and easier to just copy and paste your posts into a word doc (or Google Doc) and download as a PDF. Chances are you’re probably drafting your posts and emails in one of those tools anyway.
Then you just share that PDF download link at the end of the post. I suggest going minimalist with your PDF, since it’s secondary. Certainly include the images, but try not to worry too much about formatting.